Quantcast
Channel: THWACK: Document List - All Communities
Viewing all 9474 articles
Browse latest View live

SolarWinds Solar-PuTTY Quick Reference Guide

$
0
0

SolarWinds® Solar-PuTTY is a terminal emulation client with a browser-based user interface. Built on top of PuTTY, this free tool includes a browser-based interface with tabs that allow you to open multiple client sessions.

Solar-PuTTY extends the functionality of PuTTY, allowing you to connect to a resource using the following protocols:

  • Secure Shell (SSH)
  • Telnet
  • File Transfer Protocol (FTP)
  • SSH File Transfer Protocol (SFTP)
  • Secure Copy Protocol (SCP)


Installation requirements

Component

Requirements

Operating System

Windows® 7

Windows 8

Windows 8.1

Windows 10

Windows Server® 2012

Windows Server 2012 R2

Windows Server 2016

Microsoft®.NET

.NET 4.6.1


Download and run the tool for the first time

  1. Download the free tool here:
    https://www.solarwinds.com/solar-putty
  2. Unzip the tool.
  3. Double-click Solar-PuTTY.exe.
  4. Accept the terms of the license agreement.


Overview screen

When you launch Solar-PuTTY for the first time, the Overview screen is displayed. Here, you can enter the IP address of your remote server, or select ‘Create new session’ for additional options. See Create a new session later in this guide for details.


The Overview screen provides quick access to your saved sessions. Each session includes a screen with clickable options. These options are ordered by frequency, so the connections used the most often are always at hand.


The Overview screen includes a search bar to search for a saved session, filtering out any session that doesn’t meet your search criteria. You can also use the search bar to define a new session.


All running sessions are organized in tabs. We tried to make this behavior as browser-like as possible. You can create a new tab by clicking the + icon or CTLR+T.  You can also move the tab to a separate window by right-clicking the tab and selecting Detach. To reorder the tabs, press CTRL and the left or right arrow keys.


Create a session

You can create a new session using the Search bar, the “Create new session” form, or the Sessions tab.


Create session using the Search bar

To create a new session using the Search bar, enter the IP address or hostname and press Enter. You can also define the SSH or Telnet protocol, username, and port.

For example:

  • 192.168.1.5– Connects to the default port using SSHv2
  • Mycoolserver.company.local– Connects to the default port using SSHv2
  • telnet:192.168.1.5–  Connects to the default port using Telnet
  • admin@mycoolserver.company.local:8888–  Connects to port 8888 as an admin using SSHv2


Create a session using a form

Click “Create new session” to bring up a form. Complete the form and click Create to connect to the targeted resource and save the session


Create a session using the Settings tab

Press CTRL + S to open the Settings tab and create a new session


Discover saved PuTTY sessions

Solar-PuTTY can read registry entries and locate already existing PuTTY sessions. These sessions are automatically added to Solar-PuTTY.


Import and export sessions

To export a session, click Export Sessions under the vertical ellipsis menu. The application prompts you to set a password, which is used to encrypt the exported data file. This file contains the sessions, keys, scripts, tags, and relationships associated with these entities.

The exported data file and the application are portable. This allows you to import your saved sessions to Solar-Putty running on a different PC. During the import, the application prompts you for a password to protected data file.


Settings

You can access settings by pressing CTRL+S or clicking the vertical ellipsis menu button in the user interface.


Sessions

Click the Sessions tab to define a new session or delete an existing session. You can link your existing sessions to credentials, tags or scripts.


Credentials

Use the Credential Manager to automatically authenticate to a targeted resource using a password and keys.


Tags

Tags enhance your search options by adding labels to your saved sessions. Using the Address bar on the Overview screen, you can search these tags and automatically filter sessions to meet your search criteria.


Scripts

After you connect to a machine, use scripts in an SSH connection to send post-authentication commands to the machine.

Solar-PuTTY does not include a script editor. During a session, the tool links an existing script saved on your computer. When you create a session and authenticate, Solar-PuTTY sends the script content to the remote machine. Most servers will close the session after executing the command.


Logs

When you enable logging in your session configuration, the application logs all data sent by the server in your terminal session. When you create a new folder in the Logs tab, the application saves your log files to the folder.


Windows integration

Solar-PuTTY creates a Windows shortcut for each saved session. This allows you to search and launch a saved session using a Windows search.

You can also create a shortcut to a specific server, which you can save on your desktop or pin to your taskbar or Start menu. When you right-click the Solar-PuTTY icon on the Windows taskbar, the application provides a list of the 10 most frequent sessions.


Generate certificate

You can use the PuTTY key generator to generate your own keys. To access this feature, click the top left vertical ellipsis menu and select “Generate certificate”. See the PuTTY User Manual for details.


File Transfer protocols

You can extend Solar-PuTTY to support FTP, SFTP and SCP protocols. To configure a protocol to your session, click the Type of connection drop-down menu on the new session form and select a protocol.

The menu includes the SCP/SFTP/FTP option, which is grayed out. To add support for these protocols, click Download. The application downloads the WinSCP libraries from a third-party location and restart. When the download is completed, you can use the selected protocols in your sessions.


Solar-PuTTY keyboard shortcuts

Shortcut

Action

CTRL+T

Opens a new tab

CTRL+N

Opens a new window

CTRL+E

Opens the Create new session form

CTRL+S

Opens the Settings tab

CTRL+R

Reconnects to the targeted machine

CTRL+W

Closes the current tab

CTRL+SHIFT+T

Opens the previously-closed tab

CTRL+TAB

Switches between tabs (left to right)

CTRL+SHIFT+TAB

Switches between tabs (right to left)

CTRL+1-8

Switches to the specified tab

CTRL+9

Switches to the last tab

ALT+F4

Closes the current window


Solar-PuTTY CLI arguments

Argument

Action

-a, --passphrase      

Passphrase used for authentication

-b, --ftp

Starts an FTP session

-c, --scp

Starts an SCP session

-d, --dark

Switches to Dark mode [beta]

-e, --remote

SCP/SFTP/FTP remote directory

-f, --sftp

Starts an SFTP session

-h, --hostname

Hostname used in the connection

-i, --sessionid

Session ID to be opened

-k, --key

Path to a key file used for authentication

-l, --log

Enables session logging to the logging folder

-o, --port

Connection port number

-p, --password

Password used for authentication

-r, --script

Patch to a script file that runs after the authentication

-s, --ssh

Starts an SSHv2 session

-t, --telnet

Starts a Telnet session

-u, --username

Username used to authenticate to the machine

-v, --ssh1

Starts an SSHv1 session

--help

Displays the online help

--version

Displays the current version


Orion製品全般:リリースノートやライセンスカウントなど

$
0
0

※以下は2018/7/2の情報。随時更新予定

※EOL (End of Life)を超過したバージョンは含まない

EOLリスト(英語): Currently supported software versions - SolarWinds Worldwide, LLC. Help and Support


NPM

12.3 HF1: NPM 12.3 Hotfix 1 - SolarWinds Worldwide, LLC. Help and Support

12.3: NPM 12.3 Release Notes - SolarWinds Worldwide, LLC. Help and Support

12.2 HF1,2,3: NPM 12.2 Hotfix 3 - SolarWinds Worldwide, LLC. Help and Support

12.2: NPM 12.2 Release Notes - SolarWinds Worldwide, LLC. Help and Support

12.1 HF1: NPM 12.1 Hotfix 1 - SolarWinds Worldwide, LLC. Help and Support

12.1: NPM 12.1 Release Notes - SolarWinds Worldwide, LLC. Help and Support

12.0.1 HF1: NPM 12.0.1 Hotfix 1 - SolarWinds Worldwide, LLC. Help and Support

12.0.1: NPM 12.0.1 Release Notes - SolarWinds Worldwide, LLC. Help and Support

12.0 HF4: NPM 12.0 Hotfix 4 - SolarWinds Worldwide, LLC. Help and Support

12.0 HF3: NPM 12.0 Hotfix 3 - SolarWinds Worldwide, LLC. Help and Support

12.0 HF2: NPM 12.0 Hotfix 2 - SolarWinds Worldwide, LLC. Help and Support

12.0 HF1: NPM 12.0 Hotfix 1 - SolarWinds Worldwide, LLC. Help and Support

12.0: Network Performance Monitor (NPM) 12 - SolarWinds Worldwide, LLC. Help and Support

11.5.x HF: NPM 11.5.X Hotfixes - SolarWinds Worldwide, LLC. Help and Support

11.5.3: NPM 11.5.3 Release Notes - SolarWinds Worldwide, LLC. Help and Support

11.5.2: NPM 11.5.2 Release Notes - SolarWinds Worldwide, LLC. Help and Support

11.5.1: NPM 11.5.1 Release Notes - SolarWinds Worldwide, LLC. Help and Support

11.5: NPM 11.5 Release Notes - SolarWinds Worldwide, LLC. Help and Support


まとめページ: NPM Documentation - Previous Versions - SolarWinds Worldwide, LLC. Help and Support

バージョンごとの機能比較:New Feature Summary NPM - SolarWinds Worldwide, LLC. Help and Support


ライセンスカウント方法:ノード(機器)、ボリューム(サーバの論理ドライブ)、インターフェイス(仮想/物理) の各カウント数

NPM licensing - SolarWinds Worldwide, LLC. Help and Support


[※Orion Platform の HFは、各製品の導入パッケージに含まれている場合が多い]

2018.2 HF2: Orion Platform 2018.2 Hotfix 2 - SolarWinds Worldwide, LLC. Help and Support

2018.2 HF1: Orion Platform 2018.2 Hotfix 1 - SolarWinds Worldwide, LLC. Help and Support

2017.3 HF5: Orion Platform 2017.3 Hotfix 5 - SolarWinds Worldwide, LLC. Help and Support

2017.3 HF4: Orion Platform 2017.3 Hotfix 4 - SolarWinds Worldwide, LLC. Help and Support

2017.3 HF3: Orion Platform 2017.3 Hotfix 3 - SolarWinds Worldwide, LLC. Help and Support

2017.3 HF2: Orion Platform 2017.3 Hotfix 2 - SolarWinds Worldwide, LLC. Help and Support

2017.3 HF1: Orion Platform 2017.3 Hotfix 1 - SolarWinds Worldwide, LLC. Help and Support

2017.1 HF3: Orion Platform 2017.1 Hotfix 3 - SolarWinds Worldwide, LLC. Help and Support

2017.1 HF2: Orion Platform 2017.1 Hotfix 2 - SolarWinds Worldwide, LLC. Help and Support

2017.1 HF1: Orion Platform 2017.1 Hotfix 1 - SolarWinds Worldwide, LLC. Help and Support

2016.2 HF2: Orion Platform 2016.2 Hotfix 2 - SolarWinds Worldwide, LLC. Help and Support

2016.2 HF1: SolarWinds Orion Platform 2016.2 Hotfix 1 - SolarWinds Worldwide, LLC. Help and Support

2016.1 HF4: SolarWinds Orion Platform 2016.1 HotFix 4 - SolarWinds Worldwide, LLC. Help and Support

2016.1 HF3: SolarWinds Orion Platform 2016.1 Hotfix 3 - SolarWinds Worldwide, LLC. Help and Support

2016.1 HF2: Orion Platform 2016.1 Hotfix 2 - SolarWinds Worldwide, LLC. Help and Support

2016.1 HF1: Orion Platform 2016.1 Hotfix 1 - SolarWinds Worldwide, LLC. Help and Support

2015.1.3 HF3: Orion Platform 2015.1.3 hotfix 3 - SolarWinds Worldwide, LLC. Help and Support

2015.1.2 HF6: Orion Platform 2015.1.2 HotFix 6 - SolarWinds Worldwide, LLC. Help and Support

2015.1.2 HF5: Orion Platform 2015.1.2 Hotfix 5 - SolarWinds Worldwide, LLC. Help and Support

2015.1.2 HF1: Orion Platform v2015.1.3 HotFix 1 - SolarWinds Worldwide, LLC. Help and Support

2015.1 HF4: Orion Platform 2015.1 HotFix 4 - SolarWinds Worldwide, LLC. Help and Support

2015.1 HF3: Orion Platform 2015.1 Hotfix 3 - SolarWinds Worldwide, LLC. Help and Support

2015.1 HF2: Orion Platform 2015.1 Hotfix 2 - SolarWinds Worldwide, LLC. Help and Support


まとめページ: Orion Platform hotfixes - SolarWinds Worldwide, LLC. Help and Support

バージョンごとの機能比較:(該当リンクなし。上の各Release Note を参照ください)


NTA

4.4 HF1: NetFlow Traffic Analyzer 4.4 Hotfix 1 - SolarWinds Worldwide, LLC. Help and Support

4.4: NetFlow Traffic Analyzer 4.4 Release Notes - SolarWinds Worldwide, LLC. Help and Support

4.2.3: NTA 4.2.3 Release Notes - SolarWinds Worldwide, LLC. Help and Support

4.2.2: NTA 4.2.2 Release Notes - SolarWinds Worldwide, LLC. Help and Support

4.2.1 HF3: NTA 4.2.1 Hotfix 3 - SolarWinds Worldwide, LLC. Help and Support

4.2.1 HF2: NTA 4.2.1 Hotfix 2 - SolarWinds Worldwide, LLC. Help and Support

4.2.1 HF1: NTA 4.2.1 Hotfix 1 - SolarWinds Worldwide, LLC. Help and Support

4.2.1: NetFlow Traffic Analyzer 4.2.1 Release Notes - SolarWinds Worldwide, LLC. Help and Support

4.2.0 HF2: NTA 4.2 Hotfix 2 - SolarWinds Worldwide, LLC. Help and Support

4.2.0 HF1: NTA 4.2 HotFix 1 - SolarWinds Worldwide, LLC. Help and Support

4.2.0: NetFlow Traffic Analyzer 4.2 Release Notes - SolarWinds Worldwide, LLC. Help and Support

4.1.2: NetFlow Traffic Analyzer 4.1.2 Release Notes - SolarWinds Worldwide, LLC. Help and Support

4.1.1: NTA 4.1.1 Release Notes - SolarWinds Worldwide, LLC. Help and Support

4.1: NTA 4.1 Release Notes - SolarWinds Worldwide, LLC. Help and Support

4.0.3 HF1: NTA 4.0.3 Hotfix 1 - SolarWinds Worldwide, LLC. Help and Support

4.0: NTA 4.0 Release Notes - SolarWinds Worldwide, LLC. Help and Support


まとめページ: NTA Documentation - Previous Versions - SolarWinds Worldwide, LLC. Help and Support

バージョンごとの機能比較:(該当リンクなし。上の各Release Note を参照ください)


ライセンスカウント方法:※NTAはNPMのアドオン製品の為、NPMと同一ライセンスを選択する必要がある

SolarWinds NTA licensing - SolarWinds Worldwide, LLC. Help and Support


NCM

7.8: NCM 7.8 Release Notes - SolarWinds Worldwide, LLC. Help and Support

7.7 HF4: NCM 7.7 Hotfix 4 - SolarWinds Worldwide, LLC. Help and Support

7.7 HF3: NCM 7.7 Hotfix 3 - SolarWinds Worldwide, LLC. Help and Support

7.7 HF2: NCM 7.7 Hotfix 2 - SolarWinds Worldwide, LLC. Help and Support

7.7 HF1: NCM 7.7 Hotfix 1 - SolarWinds Worldwide, LLC. Help and Support

7.7: Network Configuration Manager 7.7 Release Notes - SolarWinds Worldwide, LLC. Help and Support

7.6: NCM 7.6 Release Notes - SolarWinds Worldwide, LLC. Help and Support

7.5.1: NCM 7.5.1 Release Notes - SolarWinds Worldwide, LLC. Help and Support

7.5 HF2: Network Configuration Manager (NCM) v7.5 HotFix 2 - SolarWinds Worldwide, LLC. Help and Support

7.5 HF1: Network Configuration Manager v7.5 Hotfix 1 - SolarWinds Worldwide, LLC. Help and Support

7.5: NCM 7.5 Release Notes - SolarWinds Worldwide, LLC. Help and Support


まとめページ: NCM Documentation - Previous Versions - SolarWinds Worldwide, LLC. Help and Support

バージョンごとの機能比較:New Feature Summary NCM - SolarWinds Worldwide, LLC. Help and Support


ライセンスカウント方法:コンフィグ管理対象の機器数

About SolarWinds NCM Licensing - SolarWinds Worldwide, LLC. Help and Support


IPAM

4.7 HF1: IP Address Monitor 4.7 Hotfix 1 - SolarWinds Worldwide, LLC. Help and Support

4.7: IP Address Manager 4.7 Release Notes - SolarWinds Worldwide, LLC. Help and Support

4.6: IP Address Manager 4.6 Release Notes - SolarWinds Worldwide, LLC. Help and Support

4.5.2: IP Address Manager 4.5.2 Release Notes - SolarWinds Worldwide, LLC. Help and Support

4.5.1: IP Address Manager 4.5.1 Release Notes - SolarWinds Worldwide, LLC. Help and Support

4.5: IP Address Manager 4.5 Release Notes - SolarWinds Worldwide, LLC. Help and Support

4.3.2: IPAM 4.3.2 Release Notes - SolarWinds Worldwide, LLC. Help and Support

4.3.1: IP Address Manager 4.3.1 Release Notes - SolarWinds Worldwide, LLC. Help and Support

4.3: IP Address Manager 4.3 Release Notes - SolarWinds Worldwide, LLC. Help and Support

4.2: IP Address Manager 4.2 Release Notes - SolarWinds Worldwide, LLC. Help and Support

4.1: IP Address Manager 4.1 Release Notes - SolarWinds Worldwide, LLC. Help and Support


まとめページ: Previous Versions - SolarWinds Worldwide, LLC. Help and Support

バージョンごとの機能比較:New Feature Summary IPAM - SolarWinds Worldwide, LLC. Help and Support


ライセンスカウント方法:監視ステータスが「Used, Reserved, Transient」であるIPアドレスの数

IPAM licensing and deployment - SolarWinds Worldwide, LLC. Help and Support


UDT

3.3.1: User Device Tracker 3.3.1 Release Notes - SolarWinds Worldwide, LLC. Help and Support

3.3: User Device Tracker 3.3 Release Notes - SolarWinds Worldwide, LLC. Help and Support

3.2.3: User Device Tracker 3.2.3 Release Notes - SolarWinds Worldwide, LLC. Help and Support

3.2.2: User Device Tracker 3.2.2 Release Notes - SolarWinds Worldwide, LLC. Help and Support

3.2: UDT Version 3.2 Release Notes - SolarWinds Worldwide, LLC. Help and Support

3.1: UDT Version 3.1 Release Notes - SolarWinds Worldwide, LLC. Help and Support

3.0.2: UDT Version 3.0.2 Release Notes - SolarWinds Worldwide, LLC. Help and Support

3.0.1: UDT Version 3.0.1 Release Notes - SolarWinds Worldwide, LLC. Help and Support

3.0: UDT Version 3.0 Release Notes - SolarWinds Worldwide, LLC. Help and Support


まとめページ: Previous Versions - SolarWinds Worldwide, LLC. Help and Support

バージョンごとの機能比較:(該当リンクなし。上の各Release Note を参照ください)


ライセンスカウント方法:監視(物理)ポートの数

UDT licensing information - SolarWinds Worldwide, LLC. Help and Support


SAM

6.6.1 HF1: SAM 6.6.1 hotfix release notes - SolarWinds Worldwide, LLC. Help and Support

6.6.1: SAM 6.6.1 release notes - SolarWinds Worldwide, LLC. Help and Support

6.6: SAM 6.6 release notes - SolarWinds Worldwide, LLC. Help and Support

6.5: Server & Application Monitor 6.5 Release Notes - SolarWinds Worldwide, LLC. Help and Support

6.4 HF2: AppInsight for Exchange is unable to poll mailboxes - SolarWinds Worldwide, LLC. Help and Support

6.4 HF1: https://support.solarwinds.com/Success_Center/Server_Application_Monitor_(SAM)/SAM_6.4_HotFix_1

6.4: Server & Application Monitor 6.4 Release Notes - SolarWinds Worldwide, LLC. Help and Support

6.3 HF2: SAM 6.3 Hotfix 2 - SolarWinds Worldwide, LLC. Help and Support

6.3 HF1: Server & Application Monitor 6.3 Hotfix 1 - SolarWinds Worldwide, LLC. Help and Support

6.3: Server & Application Monitor 6.3 Release Notes - SolarWinds Worldwide, LLC. Help and Support

6.2.4 HF1: Server & Application Monitor 6.2.4 Hotfix 1 - SolarWinds Worldwide, LLC. Help and Support

6.2.4: Server & Application Monitor 6.2.4 Release Notes - SolarWinds Worldwide, LLC. Help and Support

6.2.3 HF1: Server & Application Monitor (SAM) 6.2.3 Hotfix 1 - SolarWinds Worldwide, LLC. Help and Support

6.2.3: SAM 6.2.3 Release Notes - SolarWinds Worldwide, LLC. Help and Support

6.2.2: SAM 6.2.2 Release Notes - SolarWinds Worldwide, LLC. Help and Support

6.2.1: SAM 6.2.1 Release Notes - SolarWinds Worldwide, LLC. Help and Support

6.2: SAM 6.2 Release Notes - SolarWinds Worldwide, LLC. Help and Support


まとめページ: SAM Documentation - Previous Versions - SolarWinds Worldwide, LLC. Help and Support

バージョンごとの機能比較:New Feature Summary for SAM - SolarWinds Worldwide, LLC. Help and Support


ライセンスカウント方法:ノード(機器)、ボリューム(サーバの論理ドライブ)、コンポーネント の各カウント数

※コンポーネント:アプリケーション監視テンプレートに含まれる実際の監視項目(プロセス、サービス、イベントなど、の数)

SAM licensing model detailed - SolarWinds Worldwide, LLC. Help and Support


WPM

2.2.2: WPM 2.2.2 Release Notes - SolarWinds Worldwide, LLC. Help and Support

2.2.1 HF6: WPM 2.2.1 Hotfix 6 - SolarWinds Worldwide, LLC. Help and Support

2.2.1 HF5: https://support.solarwinds.com/Success_Center/Web_Performance_Monitor_(WPM)/Knowledgebase_Internal/WPM_2.2.1_Hotfix_5

2.2.1 HF4: WPM 2.2.1 Hotfix 4 - SolarWinds Worldwide, LLC. Help and Support

2.2.1 HF3: WPM 2.2.1 Hotfix 3 - SolarWinds Worldwide, LLC. Help and Support

2.2.1 HF2: WPM 2.2.1 Hotfix 2 - SolarWinds Worldwide, LLC. Help and Support

2.2.1 HF1: WPM 2.2.1 Hotfix 1 - SolarWinds Worldwide, LLC. Help and Support

2.2.1: WPM 2.2.1 Release Notes - SolarWinds Worldwide, LLC. Help and Support

2.2 HF3: SolarWinds Web Performance Monitor 2.2 HotFix 3 - SolarWinds Worldwide, LLC. Help and Support

2.2: WPM 2.2 Release Notes - SolarWinds Worldwide, LLC. Help and Support

2.1: WPM 2.1 Release Notes - SolarWinds Worldwide, LLC. Help and Support

2.0: WPM 2.0 Release Notes - SolarWinds Worldwide, LLC. Help and Support

(SEUM)1.5: SEUM 1.5 Release Notes - SolarWinds Worldwide, LLC. Help and Support


まとめページ: Previous Versions - SolarWinds Worldwide, LLC. Help and Support

バージョンごとの機能比較:(該当リンクなし。上の各Release Note を参照ください)


ライセンスカウント方法:監視(動作)のトランザクションの数

※トランザクション:監視するWeb URL遷移の記録

Licensing WPM - SolarWinds Worldwide, LLC. Help and Support


VMan

8.2.1: Virtualization Manager 8.2.1 Release Notes - SolarWinds Worldwide, LLC. Help and Support

8.2: Virtualization Manager 8.2 Release Notes - SolarWinds Worldwide, LLC. Help and Support

8.1: Virtualization Manager 8.1 Release Notes - SolarWinds Worldwide, LLC. Help and Support

8.0: VMAN 8.0 Release Notes - SolarWinds Worldwide, LLC. Help and Support

7.2: VMAN 7.2 Release Notes - SolarWinds Worldwide, LLC. Help and Support

7.1 HF2: SolarWinds Virtualization Manager 7.1 HotFix 2 - SolarWinds Worldwide, LLC. Help and Support

7.1 HF1: SolarWinds Virtualization Manager 7.1 HotFix 1 - SolarWinds Worldwide, LLC. Help and Support

7.1: Virtualization Manager 7.1 Release Notes - SolarWinds Worldwide, LLC. Help and Support

7.0: Virtualization Manager 7.0 Release Notes - SolarWinds Worldwide, LLC. Help and Support

6.3.2: Virtualization Manager 6.3.2 Release Notes - SolarWinds Worldwide, LLC. Help and Support

6.3.1: VMAN 6.3.1 Release Notes - SolarWinds Worldwide, LLC. Help and Support

6.3: Virtualization Manager version 6.3 and Integrated Virtual Infrastructure Monitor (IVIM) version 2.1 Release Notes - Sola…


まとめページ: Previous Versions - SolarWinds Worldwide, LLC. Help and Support

バージョンごとの機能比較:New Feature Summary VMAN - SolarWinds Worldwide, LLC. Help and Support


ライセンスカウント方法:監視対象に含まれるホスト(ESXiなど)機器が有する物理CPUの数

※例:CPUソケットが4つでも、実搭載CPUが2つの場合、カウントは 2

VMAN licensing information - SolarWinds Worldwide, LLC. Help and Support


その他

ライセンスに関するまとめページ(英語)

Guide to SolarWinds Product Licenses - SolarWinds Worldwide, LLC. Help and Support

Oracle Dataguard.apm-template

Oracle Database.apm-template

Oracle Automatic Storage Management.apm-template

Slack Alert Integration - Overview

$
0
0

Overview

I've created some Powershell scripts that call into Slack's API and pass the necessary info from Orion. This works great to receive alerts to a specific Slack channel.


Prerequisites:

  • Need to install Powershell v3 or greater on your Solarwinds Orion server. We specifically use the Invoke-RestMethod cmdlet. You can download that here.
  • Need to create a team with Slack if you have not already done so.
    • Need to setup an incoming Web Hook. Here is a link that talks about how that can be set up.
  • Download the scripts at links right below this section
    • Place them in a directory on your Orion server
    • Edit each script and fill out the necessary sections in the beginning. That information is most likely going to be exactly the same for each script.


Configuration

Below are links that outline different alert types in Orion, each with it's own instructions and custom Powershell script.

Slack - Alert Integration - Node

Slack - Alert Integration - Node CPU

Slack - Alert Integration - Node Memory

Slack - Alert Integration - Node Disk

Slack - Alert Integration - Node Response Time

Slack - Alert Integration - Node Packet Loss

Slack - Alert Integration - Interface

Slack - Alert Integration - Application

Slack - Alert Integration - Component


Screenshot of how this is formatted in Slack.

2016-05-05 14_30_05-Slack - LehiSalesEngineering.png


Please check back often to see if there have been any improvements or bug fixes to this script.


**Change Log**

  • 2016-03-01 : Initial release
  • 2016-03-18 : Added new scripts and refreshed already existing ones.
  • 2016-05-06 : Major overhaul. revamped message to Slack attachments for better formatting. Please also update your 'Network path to external program' in the alert action as some variables have been changed/added.


If you find this useful feel free to rate this article.

CDP_Neighbor_Resource_v2.SWQL

Remote Desktop 2016 Licensing Usage


Custom Alert - Monitor Service Broker Queue Tables

$
0
0

Description

This alert will count the rows in any queue tables and alert you when they are high. If they are high, this could indicate tasks are not getting processed in a timely fashion or processed at all.


Alert Definition

To create the alert, click on Alerts > Manage Alerts tab and create a Custom Alert of type Custom SQL Alert - Multiple Numeric Return. Configure the alert with values similar to these:


Alert Name: Monitor Service Broker Queues


Execution Interval: 10 Minutes


Notification Text: If you are getting this alert, the Service Broker queue listed below is filling up.


SQL Script:


SET NOCOUNT ON

-- drop temp table if exists and recreate

IF OBJECT_ID('tempdb..#QueueTableInfo') IS NOT NULL

     DROP TABLE #QueueTableInfo;

CREATE TABLE #QueueTableInfo (db_name sysname, queue_name sysname, row_count bigint);


DECLARE @SQL varchar(1000), @db_name sysname;

-- loop through non-system databases only

DECLARE c_db CURSOR FOR

SELECT name

FROM sys.databases

WHERE database_id > 4; --might need to exclude more dbs


OPEN c_db;

FETCH c_db INTO @db_name;

WHILE @@Fetch_Status = 0

BEGIN

-- insert the queue table info for each database into the temp table

SET @SQL = 'INSERT INTO #QueueTableInfo (db_name, queue_name, row_count)

SELECT '''+@db_name+''', q.Name, p.Rows

FROM '+@db_name+'.sys.objects o

INNER JOIN '+@db_name+'.sys.partitions p ON p.object_id = o.object_id

INNER JOIN '+@db_name+'.sys.objects q ON q.object_id = o.parent_object_id

WHERE p.index_id = 1';


EXEC (@SQL);

FETCH c_db INTO @db_name;

END;

CLOSE c_db;

DEALLOCATE c_db;


-- return the results to DPA alert

SELECT db_name + '..' + queue_name AS queue_name, row_count

FROM #QueueTableInfo;

DROP TABLE #QueueTableInfo;


Execute Against: Monitored Instance


Units: Rows in Queue Table


High Threshold: Min 20, Max empty

Medium Threshold: Min 1, Max 10

Force Orion High Availability to Utilize VIP as Source IP Address

$
0
0

Orion High Availability (HA) is designed to provide uninterrupted access to the Orion Web Console as well as incoming traffic (i.e. NetFlow, Syslog, Traps, Agents). For this purpose, HA allows using a Virtual IP address (VIP), Virtual Host Name (VHN) or both, depending on the environment where HA is implemented.


But from the other perspective of monitoring the outgoing traffic can utilize any of IP addresses associated with the HA pool - VIP (if configured) or any of IP addresses of the active pool members. That means devices have to answer polling queries (i.e. SNMP) coming from any of these three IP addresses. In many environments, this may not pose any trouble, as devices IPs allow traffic from any source or network access control lists are centralized and easily modified to allow these exceptions. However, in some cases devices are locked down to certain IP address. This is typically the VIP which was previously the IP address of the initial Orion server preceding the HA implementation. This would then result in failed polling (packets being dropped/refused, data not returned). Unfortunetly, this behavior results from the way operating system (Windows) makes the decision which IP address to use as a source, which is beyond an application's ability to control.


The Windows implementation of the TCP/IP stack provides a mechanisum for letting the system know which IP addresses can be skipped during the decision-making process. For that purpose, each IP address has a property - SkipAsSource - which can be modified on the fly and immediately affect the way outgoing traffic is sent out. One of the easiest ways of doing it is to use PowerShell in conjunction with Windows Task Scheduler. Below you can find an example PowerShell script which:

  1. Checks if the VIP exists on the server, in the example below '10.160.198.8', and sets its SkipAsSource to False and at the same time sets all remaining IP addresses SkipAsSource to True, which means that Windows will use VIP for outgoing traffic
  2. in case VIP does not exist on the server sets all remaining IP addresses' SkipAsSource to False, which means Windows will use any of the IP address available for outgoing traffic


<#
.SYNOPSIS  Script adjusts SkipAsSource setting on IP addresses.

.DESCRIPTION
  Adjusting SkipAsSource settign on IP addressess allows Windows to direct traffic using as source IP address for which SkipAsSource is set to False.

.INPUTS
  None

.OUTPUTS
  None

.NOTES
  Version: 1.0  Author: Mariusz Handke   Creation Date: 2018-08-31  Purpose/Change: Initial release
#>

$VIP = "10.160.198.8"
$IPS = Get-NetAdapter | Get-NetIPAddress -AddressFamily IPv4 | foreach { $_.ipaddress }

If ($IPS -Match $VIP) {
  foreach ($IP in $IPS) {  Set-NetIPAddress –IPAddress $IP –SkipAsSource $True  }  Set-NetIPAddress –IPAddress $VIP –SkipAsSource $False
} Else {  foreach ($IP in $IPS) {  Set-NetIPAddress –IPAddress $IP –SkipAsSource $False  }
}
Implementing it as an all-the-time running solution:
  1. Save the above script to a file on the server (i.e. C:\Orion_HA_set_IP_addresses.ps1)
  2. Using Windows Task Scheduler, create a simple task which executes the above script on a recurring schedule. Be aware that shortest repetition interval the script can be executed is every five minutes, and if you require more frequent execution simply create multiple triggers within the task (i.e. 00:00, 00:01, 00:02, 00:03, 00:04 each one repeated every 5 minutes resulting in execution every minute)

Script Behaviour description:

  1. When HA pool is set up with VIP and pool is enabled, HA service will assign VIP to the network interface card (NIC) of the active server
  2. At this point, all IP addresses have their SkipAsSource set to False
  3. When the script executes it adjusts the 'SkipAsSource' property of IP addresses resulting in the active server sending traffic with VIP as source
  4. When failover occurs, the HA service removes VIP from the server resulting in the short period of outgoing traffic failure due to remaining IP addresses set to be skipped
  5. When the script executes again (quicker the better) the failover process completes as the IP addresses has now available for outgoing traffic
  6. At this point, HA completes process letting standby server take over, from which process repeats from 1.


Disclaimer:

SolarWinds Solar-PuTTY Quick Reference Guide

$
0
0

SolarWinds® Solar-PuTTY is a terminal emulation client with a browser-based user interface. Built on top of PuTTY, this free tool includes a browser-based interface with tabs that allow you to open multiple client sessions.

Solar-PuTTY extends the functionality of PuTTY, allowing you to connect to a resource using the following protocols:

  • Secure Shell (SSH)
  • Telnet
  • File Transfer Protocol (FTP)
  • SSH File Transfer Protocol (SFTP)
  • Secure Copy Protocol (SCP)


Installation requirements

Component

Requirements

Operating System

Windows® 7

Windows 8

Windows 8.1

Windows 10

Windows Server® 2012

Windows Server 2012 R2

Windows Server 2016

Microsoft®.NET

.NET 4.6.1


Download and run the tool for the first time

  1. Download the free tool here:
    https://www.solarwinds.com/solar-putty
  2. Unzip the tool.
  3. Double-click Solar-PuTTY.exe.
  4. Accept the terms of the license agreement.


Overview screen

When you launch Solar-PuTTY for the first time, the Overview screen is displayed. Here, you can enter the IP address of your remote server, or select ‘Create new session’ for additional options. See Create a new session later in this guide for details.


The Overview screen provides quick access to your saved sessions. Each session includes a screen with clickable options. These options are ordered by frequency, so the connections used the most often are always at hand.


The Overview screen includes a search bar to search for a saved session, filtering out any session that doesn’t meet your search criteria. You can also use the search bar to define a new session.


All running sessions are organized in tabs. We tried to make this behavior as browser-like as possible. You can create a new tab by clicking the + icon or CTLR+T.  You can also move the tab to a separate window by right-clicking the tab and selecting Detach. To reorder the tabs, press CTRL and the left or right arrow keys.


Create a session

You can create a new session using the Search bar, the “Create new session” form, or the Sessions tab.


Create session using the Search bar

To create a new session using the Search bar, enter the IP address or hostname and press Enter. You can also define the SSH or Telnet protocol, username, and port.

For example:

  • 192.168.1.5– Connects to the default port using SSHv2
  • Mycoolserver.company.local– Connects to the default port using SSHv2
  • telnet:192.168.1.5–  Connects to the default port using Telnet
  • admin@mycoolserver.company.local:8888–  Connects to port 8888 as an admin using SSHv2


Create a session using a form

Click “Create new session” to bring up a form. Complete the form and click Create to connect to the targeted resource and save the session


Create a session using the Settings tab

Press CTRL + S to open the Settings tab and create a new session


Discover saved PuTTY sessions

Solar-PuTTY can read registry entries and locate already existing PuTTY sessions. These sessions are automatically added to Solar-PuTTY.


Import and export sessions

To export a session, click Export Sessions under the vertical ellipsis menu. The application prompts you to set a password, which is used to encrypt the exported data file. This file contains the sessions, keys, scripts, tags, and relationships associated with these entities.

The exported data file and the application are portable. This allows you to import your saved sessions to Solar-Putty running on a different PC. During the import, the application prompts you for a password to protected data file.


Settings

You can access settings by pressing CTRL+S or clicking the vertical ellipsis menu button in the user interface.


Sessions

Click the Sessions tab to define a new session or delete an existing session. You can link your existing sessions to credentials, tags or scripts.


Credentials

Use the Credential Manager to automatically authenticate to a targeted resource using a password and keys.


Tags

Tags enhance your search options by adding labels to your saved sessions. Using the Address bar on the Overview screen, you can search these tags and automatically filter sessions to meet your search criteria.


Scripts

After you connect to a machine, use scripts in an SSH connection to send post-authentication commands to the machine.

Solar-PuTTY does not include a script editor. During a session, the tool links an existing script saved on your computer. When you create a session and authenticate, Solar-PuTTY sends the script content to the remote machine. Most servers will close the session after executing the command.


Logs

When you enable logging in your session configuration, the application logs all data sent by the server in your terminal session. When you create a new folder in the Logs tab, the application saves your log files to the folder.


Windows integration

Solar-PuTTY creates a Windows shortcut for each saved session. This allows you to search and launch a saved session using a Windows search.

You can also create a shortcut to a specific server, which you can save on your desktop or pin to your taskbar or Start menu. When you right-click the Solar-PuTTY icon on the Windows taskbar, the application provides a list of the 10 most frequent sessions.


Generate certificate

You can use the PuTTY key generator to generate your own keys. To access this feature, click the top left vertical ellipsis menu and select “Generate certificate”. See the PuTTY User Manual for details.


File Transfer protocols

You can extend Solar-PuTTY to support FTP, SFTP and SCP protocols. To configure a protocol to your session, click the Type of connection drop-down menu on the new session form and select a protocol.

The menu includes the SCP/SFTP/FTP option, which is grayed out. To add support for these protocols, click Download. The application downloads the WinSCP libraries from a third-party location and restart. When the download is completed, you can use the selected protocols in your sessions.


Solar-PuTTY keyboard shortcuts

Solar-PuTTY supports following keyboard shortcuts by default. This functionality can be turned off in application settings in case it conflicts with your remote server keyboard shortcuts.

Shortcut

Action

CTRL+T

Opens a new tab

CTRL+N

Opens a new window

CTRL+E

Opens the Create new session form

CTRL+S

Opens the Settings tab

CTRL+R

CTRL+F5

Reconnects to the targeted machine

CTRL+W

Closes the current tab

CTRL+SHIFT+T

Opens the previously-closed tab

CTRL+TAB

Switches between tabs (left to right)

CTRL+SHIFT+TAB

Switches between tabs (right to left)

CTRL+1-8

Switches to the specified tab

CTRL+9

Switches to the last tab

CTRL + ←

Move tab to the left

CTRL + →Move tab to the right
ALT+F4Closes the current window


Solar-PuTTY CLI arguments

Argument

Action

-a, --passphrase      

Passphrase used for authentication

-b, --ftp

Starts an FTP session

-c, --scp

Starts an SCP session

-d, --dark

Switches to Dark mode [beta]

-e, --remote

SCP/SFTP/FTP remote directory

-f, --sftp

Starts an SFTP session

-h, --hostname

Hostname used in the connection

-i, --sessionid

Session ID to be opened

-k, --key

Path to a key file used for authentication

-l, --log

Enables session logging to the logging folder

-o, --port

Connection port number

-p, --password

Password used for authentication

-r, --script

Patch to a script file that runs after the authentication

-s, --ssh

Starts an SSHv2 session

-t, --telnet

Starts a Telnet session

-u, --username

Username used to authenticate to the machine

-v, --ssh1

Starts an SSHv1 session

--help

Displays the online help

--version

Displays the current version

-n, --sessionnameSession name to be opened

Dameware 12.1 Beta 1 is now available

$
0
0

I have some great news. Over the last few months we have been busy working on https://thwack.solarwinds.com/thread/115793 issue. While we had attempted to update only specific areas of the Windows 10 connection code, this did not result in the quality we needed and our only step was to work with an entirely new way to connect to Windows 10 (and Windows 2019 pre releases) so that we could help ensure a positive experience going into the future. That feature is now available in the Beta 1:

Beta feedback is one of the key avenues we use to inform and adjust what we're building so that it fits your need and your environment.  We'll take feedback anytime we can get it, but now is the best time to provide feedback that will impact the product.

To get access to the beta, you need to be a customer on active maintenance for Dameware and sign up here.  To share feedback, please post on the Dameware Beta forum.

Sincerely,

Dameware Team

SIP SIP HOORAY!!!!

$
0
0

Yup, it's what oh so many of you have been waiting for...


VNQM 4.5 Beta is out and ready for you to take for a test run! The team has been working hard to bring you a release with features based on the current roadmap. Now, it's up to YOU to choose your path...


Choose wisely, friends....

Template for monitoring HACMP IBM on AIX

$
0
0

Hello:


I made this template for monitoring my AIX boxes with HACMP cluster on my SAP systems.the template was tenting on AIX 7.1.


Objetive: Monitor state HACMP Cluster services on AIX.

Description: Template monitoring cluster state.


step to implement


Create at O.S level one user, may be: solarw


#adduser solarw

#passwd solarw


the user need to have permissions to execute this HACMP commands, configure this with sudo. Example sudo file:


User_Alias ADMIN = solarw

ADMIN           ALL= NOPASSWD: ALL


note:this is a expample file, for more secure level implement with more restrictions (man sudo ).


At Solar wind create the template with bash script UNIX with this caracteristics:


2016-05-16_121143.jpg


2016-05-05_125210.jpg


in the body script implement this code:


2016-05-16_121510.jpg


#Monitorea estado del cluster HACMP

#Pedro Gonzalez Santibañez - 11/05/2016

clustat=`sudo /bin/su - root -c '/usr/es/sbin/cluster/utilities/clmgr -a state query cluster'  > /tmp/cluster.log`

state=`sed -e 's/"//g' /tmp/cluster.log | sed -e 's/STATE=//g'`

if [ $state = STABLE ]

   then

   echo "Message: Cluster state HACMP OK $state"

   echo "Statistic: 1"

else

    echo "Message: Servicio de Cluster con problemas - Revisar servicios HACMP $state"

    echo "Statistic: 0"

fi


then the monitor work without problems:


2016-05-16_122119.jpg


The command monitoring cluster HACMP service state. reference link:


https://www.ibm.com/support/knowledgecenter/SSPHQG_7.1.0/com.ibm.powerha.admngd/clmgr_cmd.htm

http://www-03.ibm.com/systems/resources/systems_power_software_availability_clmgr_tech_guide.pdf


Next step is implement more component for monitoring nodes and resources of cluster.


Enjoy!


Pedro González Santibañez.

TC18: Customize Polling Intervals With the Orion SDK

$
0
0

This script was featured on the TWHACKcamp 2018 session "There's an API for That," which you can watch in its entirety here. The two scripts I used are attached to this post.


My goal here is to explain the idea behind the script as well as point out any major design points within the code. But there are a few things I need to clear up before I begin:


First, you will probably notice that this script is written in Perl, a language with a long, illustrious, and glorious history as a text processing tool, and yet not a language which lends itself to process-oriented tasks. I selected the language because:

  1. I am old, and writing in Perl brings back memories of my youthful glory days.
  2. I am stubborn, and they said Perl wasn't the right tool for this job so I had to prove them wrong.
  3. It underscores the flexibility of the Orion API—if your programming language supports REST, then you can use it.


Second, you'll notice that I've had to load a few different packages at the start of the script to make this all work. I'll describe them in detail below, but should you decide to follow in my footsteps, you will need to get comfortable loading CPAN modules before any of this will run.


Third, I need to take a moment and express my extreme gratitude and deepest thanks to @tdanner, @kmsigma, @Zackm, and @ironman84 for their help, encouragement, support, and patience.


However, the biggest thank-you goes to Steven Klassen (a.k.a. @mrxinu), who took significant time out of his day(s) to help clean up the spaghetti that was my original attempt at this script. The best thing you could say about my original was “it ran.” After his assistance, you can say “it ran with a bit of grace and style.”


Background: What Problem Are We Solving?

When you load up a bunch of nodes in Orion® (whether you're using Network Performance Monitor, Server & Application Monitor, or some other module) you "get" a certain level of monitoring for "free." (God as my witness, the legal team insisted I use those air quotes because they're afraid someone will really think it's free.) That monitoring includes availability (up/down of the node, interfaces, disks, etc.) and statistic collection (CPU, RAM, disk space, etc.). Generally speaking, the availability data is collected by default every 120 seconds, and the statistic data is collected every 5 to 10 minutes. Which is fine, IN GENERAL.


BUT... there are some devices in your environment that need to be monitored, but not that aggressively. Like the under-the-desk server in the training room. Or the media server that plays HR training videos for new hires. Or the internet-connected coffee pot. At the other end of the spectrum are business-critical systems that need much more aggressive monitoring.


The good news is that Orion allows you to set a global standard for polling frequency, and also adjust the that frequency on a per-machine basis. The bad news is that this is, by necessity, a manual process. You have to pick the machine(s) you want to adjust and adjust them. And generally speaking, this is the right choice.


But what if you wanted to base polling frequency on a variable? What if you had a custom property that indicated the criticality of the system, and you wanted Orion to just naturally adjust polling based on that field? In that way, you could monitor a system that was in the "build" stage very lightly just to get baselines, but turn it up to 11 when you moved to "burn-in" stage, and then ratchet the polling frequency down to normal levels when the criticality was "prod-sev-3."


That's what this script does. It reads the value of a database field for each node, and adjusts the polling values accordingly.


The Values

For the sake of example, here's what I have set up:

  • I have a custom property called "Polling_Level"
  • The "Polling_Level" values and their availability (in seconds) / statistics (in minutes) frequency are:
    • Decommissioned (600/60)
    • Training (300/30)
    • Build (300/15)
    • Dev (120/15)
    • Prod-Sev-5 (300/10)
    • Prod-Sev-4 (240/5)
    • Prod-Sev-3 (120/5)
    • Prod-Sev-2 (60/2)
    • Prod-Sev-1 (30/2)
    • Scrutiny (10/1)


The Nitty Gritty (that one line of code)

The main line of code—the one that does all the heavy lifting—is here:

$response = $client->POST('/SolarWinds/InformationService/v3/Json/'.$clienturi, $newpolljson, {"Content-Type"=>"application/json"} );


But to understand it, you need a little bit of background.


Syntax of “That One Line of Code”

There are actually two syntaxes you need to understand: the syntax of the Orion API and the syntax of Perl as it relates to the API.


Regarding the API, you need to understand that you're doing an update operation (https://github.com/solarwinds/OrionSDK/wiki/REST#update-request), which requires 3 things:

  1. The URI of the object you want to update, including the SolarWinds Information Service (SWIS) prefix
  2. The value(s) you want to set the object to
  3. The content-type

In this example, my values are going to be set to:

  1. "/SolarWinds/InformationService/v3/Json/" plus the URI of the node (which is the variable $clienturi in my sample code)
  2. The field StatCollection set to a certain number of minutes, and the field PollInterval set to a certain number of seconds
  3. The content type is "application/json." Period. No decisions here, it just has to be included for the command to work.

Meanwhile, the Perl syntax happening here includes:

  1. '/SolarWinds/InformationService/v3/Json/'.$clienturi combines (concatenates) the $clienturi variable with the SWIS prefix elements
  2. To create an array of values to update, the format in Perl is: '
    StatCollection'=>"5", "PollInterval"=>"60" 
    (SEE NOTE BELOW)
  3. The content type gets enclosed in French brackets like this:
    {Content-Type"=>"application/json"}


NOTE: that's how you would manually set the variables. In my code, I'm creating a hash earlier, looking up the matching value in the "Polling Level" custom field, and taking the resulting values.


Other Important Elements for "That One Line of Code"

As I just mentioned, I'm looking up the custom property value, finding it in my hash array, and extracting those values. If you were to assign it manually, it would look like this:

%newpollvalue = ('StatCollection'=>"5", "PollInterval"=>"60");


The next thing I want to point out is converting the hashed values into JSON-compatible data. The following like does just that, using the encode_json function that comes in the "JSON" package.

my $newpolljson = encode_json \%newpollvalue;


All of that being said, if this main line was running in a complete vacuum, this this is all you would need. Of course, it's NOT running in a vacuum and I need to explain a few other dependencies.


Packages and Dependencies

At the top of the script, you'll find a few packages being invoked. Here's where each of them comes into play.


use REST::Client;

This sets up the initial REST-full connection to the SolarWinds® server, which you see in the following line.

my $client = REST::Client->new();


use MIME::Base64;

You should never keep username/passwords in clear text in your script. That’s just lazy (and also dumb, but I’m trying not to judge). Even though my sample script DOES give you the option (commented out) just in case you are having problems you think are due to authentication, it really uses an encrypted password. (More about that in a separate section of this post.) That’s what this module and the following line of code is for.

encode_base64("$username:$password", ''));


use Crypt::RC4;

This is used to decrypt the password when using secure (i.e., CORRECT) password handling to connect to the SolarWinds server.


use URI::Encode qw(uri_encode);

When you pass a query via REST, it needs to be encapsulated as a universal resource indicator (URI). This module facilitates that behavior, as in:

uri_encode($query));


use JSON::Parse ':all';

When you get a JSON response back (as when you get the record containing node details), you need to split it up into something readable. That's how the parse command works.

parse_json $client->responseContent();


use JSON; 

Finally, as mentioned in the previous section, the values you want to push to the server need to be JSON-ified, and that's what this module does.

my $newpolljson = encode_json \%newpollvalue;


Connecting to Orion

NOTE: This section is a complete aside, but also a pet peeve. Connecting correctly (i.e., safely) to your Orion instance is one of those good habits you should have, like eating right, getting enough sleep, and avoiding sweets before bedtime. Which is to say: (almost) everyone understands it's a good idea, but many will find excuses why they don't. So skip this section if you must, but understand that it *is* important to your overall Orion API health and welfare.


There are two basic options to connect your script to Orion:

  1. The quick and dirty way that makes security professionals weep and likely gets you in trouble with the auditors.
  2. The safe and correct way that will let you (and your company) sleep easier at night knowing you haven’t thrown the gates of security wide open to the ravenous hordes of hackers that lurk just outside.


The Quick and Dirty Way

This is what I use when I am first throwing a script together and don't want to worry that something about the way I'm passing credentials is slowing me down.


my $username = 'knightswhosayni';
my $password = 'icky-icky-ptang-ptang';
my $hostname = '10.110.69.72';
my $client = REST::Client->new();
$client->getUseragent()->ssl_opts(verify_hostname => 0);
$client->getUseragent()->ssl_opts(SSL_verify_mode => 'SSL_VERIFY_NONE');
$client->setHost('https://' . $hostname . ':17778');
$client->addHeader('Authorization', 'Basic ' . encode_base64("$username:$password", ''));


The Right Way

This process uses an encrypted password which can be decrypted with a key. The key is in one file on your system ("swkeyfile.txt") and the encrypted password in another ("$swhashfile.txt"). While this script makes it easy by putting everything in the same directory as the script itself, we're going to remind you that both files should be in protected areas and should only be read-able by the account the script is running under. Otherwise you have no security at all.


Step 1: Get the Key:

$keyfile = "swkeyfile.txt";
open($fh1, '<', $keyfile) or die "Could not open file '$keyfile' $!";
while ($row = <$fh1>) {   chomp $row;   $key=$row;
}
close $fh1;


Step 2: Get the Encrypted Password:

$hashfile = "swhashfile.txt";
open($fh2, '<', $hashfile) or die "Could not open file '$hashfile' $!";
while ($row = <$fh2>) {   chomp $row;   $enc_hash=$row;
}
close $fh2;


Step 3: Unencrypt the Password

$decoded = decode_base64($enc_hash);
$swpassword = RC4($key, $decoded);


Step 4: Use the Password to Connect to the Orion Server

#Set up the REST connection to the server
$client = REST::Client->new();
$client->getUseragent()->ssl_opts(verify_hostname => 0);
$client->getUseragent()->ssl_opts(SSL_verify_mode => 'SSL_VERIFY_NONE');
$client->setHost('https://' . $hostname . ':17778');
$client->addHeader('Authorization', 'Basic ' . encode_base64("$username:$swpassword", ''));


Step Zero: Create the Key and Hashed Password Files in the First Place

Yes, step zero. Before you can use the safe technique I describe in steps 1-4, you have to create those two files. This is a one-time process, but if you don't do it, none of the rest of it will work. This is the script you'll need.

#!/usr/bin/perl
use strict;
use warnings;
use Crypt::RC4;
use MIME::Base64;
use Bytes::Random::Secure qw(random_bytes random_bytes_base64 random_bytes_hex);    #see https://metacpan.org/pod/release/DAVIDO/Bytes-Random-Secure-0.29/lib/Bytes/Random/Secure.pm for full usage

#Generate random key and store it in a file
my $keyfile = "swkeyfile.txt";
my $key = random_bytes(32); # A string of 32 random bytes.
open(my $fh1, '>', $keyfile) or die "Could not open file '$keyfile' $!";
print $fh1 $key;
close $fh1;

#Now take the SolarWinds user password and encrypt it using the key
my $swpassword = "YOUR PASSWORD GOES HERE";
my $encrypted = RC4($key, $swpassword);
my $encoded = encode_base64($encrypted);
my $hashfile = "swhashfile.txt";
open(my $fh2, '>', $hashfile) or die "Could not open file '$hashfile' $!";
print $fh2 $encoded;
close $fh2;


Additional Resources

If you want to learn more about about the Orion API, then you ought to check out the following:


If you, for some insane reason, need to know about using the Orion API via Perl, then this sample offers a lot of examples:

https://github.com/solarwinds/OrionSDK/blob/master/Samples/Perl/query.pl


The Mostly Un-Necessary Summary

The rest of the script is just your usual jumble of error checking, table lookups, etc. I've tried to comment the code so that it's easier to follow, but I welcome your questions (@adatole on thwack.com or @leonadato on Twitter).


The SolarWinds trademarks, service marks, and logos are the exclusive property of SolarWinds Worldwide, LLC or its affiliates.  All other trademarks are the property of their respective owners.


All IP Addresses on a node - potential replacement resource

Clone the new Map tab onto all your custom details views

$
0
0

So for those of you who run heavily customized environments you may have noticed that the new maps view only gets added to the default node details view.  I wrote this script that looks through all the views, figures out which ones could have a Maps tab and clones it in for you.  All you need to do is run the below powershell on your Orion server under a Windows account with view customizing permissions and in 2 seconds it will add the maps tab to all your custom versions of the details views.  I've tested it pretty extensively in my lab but as always take a backup of your db before you run any scripts and let me know if you get any unexpected results.


<#------------- CONNECT TO SWIS -------------#>

# load the snappin if it's not already loaded (step 1)

if (!(Get-PSSnapin|Where-Object { $_.Name -eq"SwisSnapin" })) {

    Add-PSSnapin"SwisSnapin"

}


#define host, credentials, and sql connection string


$hostname='localhost'

#$user = "user"

#$password = "pass"

# create a connection to the SolarWinds API

#$swis = connect-swis -host $hostname -username $user -password $password -ignoresslerrors

$swis=Connect-Swis-Hostname$hostname-Trusted


<#------------- ACTUAL SCRIPT -------------#>


# get list of all views types with a map option

$viewkeys=get-swisdata$swis"SELECT distinct ViewKey FROM Orion.Views where viewtitle = 'map' and viewkey like '%StaticSubview' "


foreach ($viewkeyin$viewkeys)

    {

"Working on $viewkey"


        #get the viewgroup to use for our parent clone

$mapviewgroup=get-swisdata$swis"select top 1 viewgroup from orion.views where viewkey = '$viewkey'"


        #this will be the viewid of the parent of our clones

$cloneviewparent=get-swisdata$swis"select viewid, uri from orion.views where viewgroup = '$mapviewgroup' and viewkey = '$viewkey'"

" View to clone is $($cloneviewparent.viewid)"


#get the correct viewkey

$viewkeytoadd=get-swisdata$swis"select viewkey from orion.views where viewgroup = '$mapviewgroup' and (viewgroupposition = 1 or viewgroupposition is null)"


#find any instances of that viewtype that don't already have a map

$viewgrouptoadd=get-swisdata$swis"select viewgroup, viewgroupname, viewkey, viewtype, viewgroupposition from orion.views where viewkey = '$viewkeytoadd' and viewgroup not in (select viewgroup from orion.views where viewkey like '$viewkey%')"

"Number of view groups to clone into is $($viewgrouptoadd.viewgroup.count)"


foreach ($vgin$viewgrouptoadd.viewgroup )

{

$vieworder=get-swisdata$swis"select viewgroupname, max(viewgroupposition)+1 as position from orion.views where viewgroup = '$vg' group by viewgroupname "

"  Cloning map to $($vieworder.viewgroupname) position $($vieworder.position)"


               $newview=Invoke-SwisVerb$swisOrion.ViewsCloneView @($cloneviewparent.viewid ,"Map")

"   New Viewid is $($newview.'#text')"

$newviewuri=get-swisdata$swis" select uri from orion.views where viewid = $($newview.'#text')"

"   New view Uri is $newviewuri"

Set-SwisObject$swis-Uri"$newviewuri"-Properties @{"ViewGroupName"="$($vieworder.viewgroupname)"; “ViewGroup”="$vg"; "ViewGroupPosition"="$($vieworder.position)" }

            }


    }


-Marc Netterfield

    Loop1 Systems: SolarWinds Training and Professional Services

Table of Third Party Patches - Updated 09/06/2018

$
0
0

Simplify and automate these patches and more with SolarWinds Patch Manager.


Check out the attached spreadsheet for recent patches.

The Patch Manager catalog contains the following products:


VendorApplicationsLatest VersionLast Updated On
7-Zip7-Zip18.0505/03/18

Adobe

Air30.0.0.10706/11/18
Flash Player (ActiveX, Plugin & PPAPI)30.0.0.15408/14/18
Flash Player ESR (ActiveX & Plugin)18.0.0.38210/13/16
Shockwave12.3.4.20406/13/18
ApacheTomcat v77.0.9007/10/18
Tomcat v88.0.5307/0/18
Tomcat v8.58.5.3206/28/18

Apple

Apple Application Support6.404/03/18
Apple Mobile Device Support11.3.0.904/03/18
iTunes12.7.4.7604/03/18
QuickTime7.7.901/07/16
CitrixReceiver for Windows Enterprise4.12.0.1802006/06/18
FileZillaFileZilla Client3.36.008/29/18
FoxitFoxit Enterprise Reader9.2.0.925707/23/18
GoogleChrome68.0.3440.10608/10/18
MalwarebytesMalwarebytes Anti-Malware3.5.1.252205/11/18
MicrosoftSkype

8.29.0.50

08/30/18

Mozilla

Firefox62.009/06/18
Firefox ESR

60.1.0

07/02/18

Thunderbird60.008/08/18
SeaMonkey2.49.407/27/18
Notepad++Notepad++7.5.807/24/18
OracleJava Runtime Environment

8u181

07/19/18

OperaOpera55.0.2994.44

08/29/18

RealVNCVNC Server6.2.112/18/17

SolarWinds

Dameware MRC Standalone12.0.510/13/17
Dameware MRC Centralized12.0.510/13/17
Patch Manager WMI Providers2.1.5.600206/30/17
UltraVNCUltraVNC Server1.2.2.208/10/18
UltraVNC Viewer1.2.2.208/10/18
VLCVLC Media Player3.0.409/03/18
VMwareVMware Tools10.3.007/24/18
WinRARWinRAR5.60.006/26/18
WinZipWinZip22.5.1311405/04/18
WiresharkWireshark2.6.308/30/18


Change History (current month + 1):

09/06

  • Mozilla Firefox 62.0 (09/06)


09/03

  • VLC Media Player 3.0.4 (08/31)


08/30

  • Skype 8.29.0.50 (08/28)
  • Wireshark 2.6.3 (08/30)


08/29

  • FileZilla Client 3.36.0 (08/27)
  • Opera 55.0.2994.44 (08/23)


08/20

  • Opera 55.0.2994.37 (08/20)


08/14

  • Adobe Flash 30.0.0.154 (08/14)


08/10

  • Google Chrome 68.0.3440.106 (08/08)
  • Mozilla Firefox 61.0.2 (08/08)
  • UltraVNC Server 1.2.2.2 (08/09)
  • UltraVNC Server 1.2.2.2 (08/09)


08/08

  • FileZilla Client 3.35.2 (08/06)
  • Mozilla Thunderbird 60.0 (08/06)
  • Opera 54.0.2952.71 (08/07)

THWACK Store Items & FAQ - Updated August 16th, 2018

$
0
0

Welcome to the pride and joy of the THWACK team - our community-based store! Here, you can spend your hard-earned THWACK points on some amazing items. We're very excited to be able to give back to all who've helped us along the way with feedback, contributions, and your work with the SolarWinds teams. Below are the items available for purchase, and a little information on how the process works.


  • The THWACK Store can be found here, or by clicking the "SHOP" portion of the THWACK navigation, above.
  • We have an amazing new and improved order process. Check it our here.
  • Need more ways to earn points? Click here to find out how.
  • Having issues with an order? You can contact us here at any time. We'll be sure to get back to you within 2-3 business days.


SolarWinds Stickers

Pack of 5 - 300 points

Geek Buttons

Pack of 5 - 300 points

Foam Hat

500 points

Window Basketball Hoop

1,500 points

THWACK Hammer

1,500 points

Koozie

1,500 points

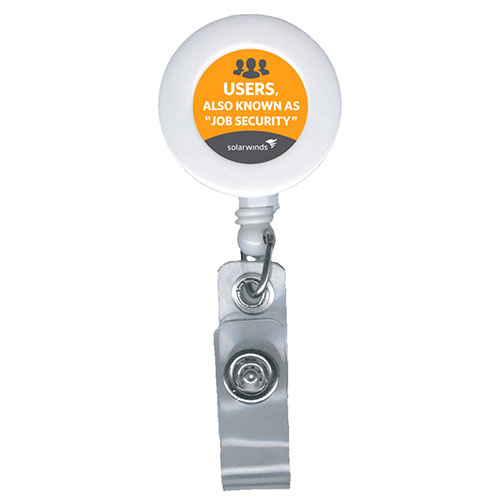
Retractable Badge Holder

Users. Also Known as "Job Security" - 2,000 points

Retractable Badge Holder

My Boss' Ego is Over-Provisioned - 2,000 points

SolarWinds Lanyard

3,000 points

THWACK Notebook

5,000 points

Laptop Sleeve

5,000 points

SolarWinds Geek Tee

5,000 points

SolarWinds Lab Tee

5,000 points

"Replace User and Try Again" Tee

5,000 points

Threat Hunter Tee

Guardians of Scurity - 6,000 points

"Rage Against the Virtual Machine" Tee

6,000 points

SolarWinds Lab Flask

25 oz - 6,000 points

SolarWinds Polo

8,000 points

SolarWinds USB Drive

8 GB - 8,000 points

Laptop Skin

SolarWinds Buttons - 8,000 points

SolarWinds Socks

Gray with Orange Flares - 10,000 points

SolarWinds Socks

White with Orange Stripes - 10,000 points

SolarWinds Socks

Gray and Orange Argyle - 10,000 points

SolarWinds Raincoat

12,000 points

SolarWinds Socks

Choarcoal and Blue - 12,000 points

SolarWinds Socks

Multi-Colored Triangles - 12,000 points

SolarWinds Socks

Blue with Orange Flares - 12,000 points

SolarWinds Hoodie

12,000 points

THWACK Messenger Bag

15,000 points

THWACK Hammock

15,000 points

Men's Zip-Up Jacket

15,000 points

Women's Zip-Up Jacket

15,000 points

THWACK Bluetooth Speaker

18,000 points

THWACK Backpack

25,000 points

Custom THWACK Cornhole Set

Includes Sandbags - 100,000 points

SolarWinds Beats Headphones

Bluetooth Wireless - 125,000 points


Frequently Asked Questions

Will I lose my spot on the leaderboard or my badges if I purchase an item from the store?

No, you will not lose your spot on the leaderboard nor your badges.  However, the store will deduct these points from your available balance.  For example, if you have 5,000 points and you purchase a laptop sleeve for 2,000 points, your point value will reflect 3,000 but your spot on the leaderboard will not change.  In other words, the leaderboard runs off of your lifetime balance and all of your earned badges will stay in your profile.

Is the shipping cost covered?

Yes. There will be no cost to you.

What countries do you ship to?

United States, Canada, United Kingdom, and Germany are currently the only countries we ship to.

My points were deducted, but I don't live in any of the eligible countries for shipping. How can I get my points back?

Please email thwackstore@solarwinds.com for assistance.

How soon will I receive my item?

After your order has been processed and shipped, you should receive your item within 7-10 business days. If an item is on backorder, you may not be notified automatically. You will receive your item, but it may take up to 30 days to restock the item.

How do I purchase an item from the store?

You will begin the purchasing process in a similar way, but will soon see the changes. You'll be presented with a list of products you're able to purchase. After clicking the purchase button, the item card rotates and presents a "confirm" button.


After clicking Confirm, you will be presented with a shopping cart dialog. Here, you can review the items in the cart, checkout, or keep shopping. A recent feature includes the ability to remove the item from the cart.


A new icon in the header will show you the current number of items in your cart. Clicking this icon will also bring up the shopping cart dialog. No longer will you lose your order if you have to step away!


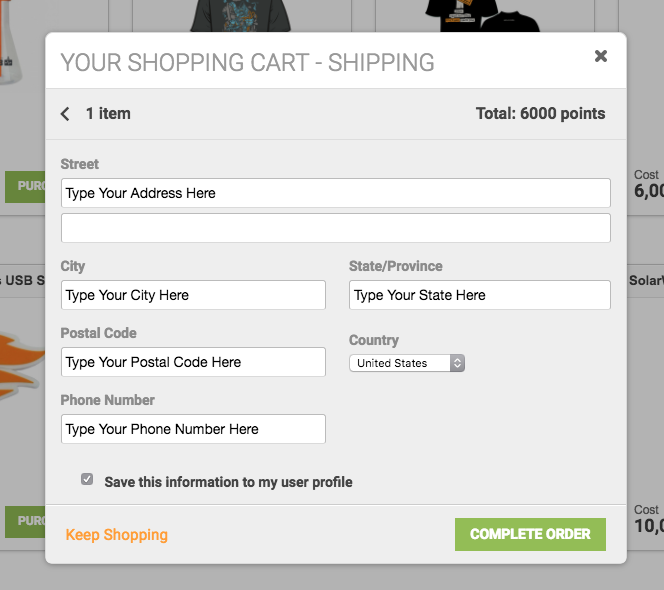
Clicking the Checkout Now button will transition the dialog to a form that allows you to fill in a new address. Selecting the "Save this information to my user profile" checkbox will make sure your address is pre-populated for any future orders. You'll still be asked to verify your address before shiping.


Once finished, you click on the Complete Order button.

After clicking the Complete Order button, you will then be presented with an Order Complete dialog, explaining what happens next.


Until an order has been confirmed Received by our fulfillment vendor, you will see an order status icon in the header bar next to your login name. The number next to the icon indicates the number of open orders.


Clicking this icon will present an Order Status dialog that shows the fulfillment stage the order is in, along with a link to track the package it has already been shipped. You'll also note orders can be in three major stages: Order Submitted, Order Processing, and Order Shipping


Questions?  Feel free to post a comment below.

It's Quiet...Too Quiet!

$
0
0

Hello ipMonitor fans!  We are looking for your feedback!  There has been a bit of radio silence around the product from the SolarWinds team, and we are looking to change that.  We are currently working on some updates that we know are needed, and planning out the future road-map.  As in all products at SolarWinds we focus our designs based on solving problems for you.  This is your chance to have input and help shape the future of ipMonitor.


We would love to hear from you, and are happy to offer 3000 Thwack points for those users who are willing to jump on a call.  On the call we want to see how you are using ipMonitor today, and what you would like to see improved in future releases.  The points give you access to lots of cool SolarWinds SWAG, but more importantly, allows us to understand your needs, what you like, and what you don't like about a product that is critical to your daily responsibilities.  If you can't jump on a call, please still feel free to share your feedback below as we know everyone is always busy and we appreciate any input you can share.  We look forward to hearing from you!  

Viewing all 9474 articles
Browse latest View live


<script src="https://jsc.adskeeper.com/r/s/rssing.com.1596347.js" async> </script>